Sunday, July 01, 2012

Wedding Shower Guest Book

So now, at last, I can post pictures of the wedding shower guest book I made for my friend's daughter, Marga. I had a little trouble with the binding as I couldn't make up my mind which would be better: ribbons to be tied in bows or key rings?  Whichever Marga chooses, it will work out perfectly.

I assigned my daughter, Chrissie, who is one of the bridesmaids, to be in-charge of the guest book.  She went around greeting guests giving out journaling tags, explaining what the guests are supposed to do.  I think most of them are used to seeing a notebook that looks like an address book.


So here's Chrissie with her basket full of tags... I pulled her aside when I got a chance so I can take a picture of her by the lake.

The guest book is made of chipboard and patterned cardstock SEI's "Couture".  I had to choose papers with the color purple as that was Marga's color theme.  This is 12" tall x 6.5" wide.


I bound the album with purple bows.  The cover is decorated with Prima flowers centered with pink beads, a Tim Holtz plate, Recollections bling, yellowish roses that I got from the wedding section at Michael's.  I just hand-wrote the title of the album.

The inside front cover (page 1) has an acetate pocket to hold the journaling tags.  I meant for this to house a copy of the wedding shower party invitation.  I also made a small photo mat which I glued on the sides and bottom so I could insert another tag behind it.


Between pages 1 and 2 is a purple bi-fold photo mat that can hold 3 photos.  The right fold is a pocket and holds another tag for Marga's own journaling or a couple more of tiny photos.  This tag is topped with a purple flower.  

On page 2, I added several tiny mats, like a waterfall effect.  I glued strips of purple cardstock punched with one of Martha Stewart's punchers at the bottom of each page to make it look like the edges are laced .


Pages 3 and 4 (below) are open spaces for bigger photos.  Page 4 has 3 inserts, each holding a photo mat and 3 journal tags.


Pages 5 (below) holds more journal tags tied with bows of different colors.  The edges of the tags are inked using Colorbox and Tim Holtz Distress inks.  Strips of paper using a Martha Stewart puncher are used to hold the tags in place.

Page 6 is blank for bigger photos.


Page 7 (below) is blank for more photos, or Marga may write her thoughts about the day on this page, or make a list of gifts she received. Page 8 was made just like Page 4, above. I folded the patterned paper in half, glued it on each end and in thirds to make pockets.


The flip side of Page 8 was made just like Page 5 above. One side of this page was punched with another Martha Stewart puncher.  The strips of paper is from a purple cardstock this time.


A couple of tags were pulled out to show front and back.  On the front, I wrote "Wishes for you" so guests will know that this was meant for them to write their greetings for Marga and Zax.  The flip side of the tag is where the well-wisher will write their contact information.


Pages 9 and 10 were left blank for bigger photos.  I made a trifold, adhered it on page 9 and tied it with a purple bow to prevent it from flopping around.  I then inserted one of the tags behind the ribbon.  The trifold can hold 5 small photos.


I glued a pretty lace ribbon on page 11.  This will hold more tags or photos. Between pages 11 and 12, I made a purple photo mat insert.  Marga can either adhere photos here or write something about what games were played, who won, and what the prizes were.


Both sides of the lavender photo mat is a pocket to hold more journal tags.


Page 12 is designed exactly like page 4.  Pages 13 and 14 were left blank for more journaling or photos.


I found these metal treasures at Walmart.  They are just so perfect for this album. And I ended up using ribbons and bows instead of the binding rings.  At that time I couldn't find big ones that would fit all these pages.

TFL


Wednesday, May 09, 2012

A Visit by Pinkee

My youngest sister, Pinkee will be visiting in a few days.  I cannot wait for the day when we go pick her up at the airport (though I don't really wish the days to go zoom by, I just couldn't help it!).  I haven't seen my sister since January 2010.  Time really flies!  So everyday at the office,  I am now the one who says, "can we go home now?", like almost every time I complete one thing.

Pinkee will stay with us for 2 weeks only.  I wish it were a month, at least! [Sigh]  It will be very difficult to see her leave when the time comes.  I took Fridays and Mondays off so I will have long weekends with Pinkee. Besides, in consideration for my officemates, I have to be with them especially on Wednesdays, the busiest day of the week.

So... the plans I have for Pinkee:  take her to Michael's, to Jo-Ann's, to Hobby Lobby, to the Royal Buffet in Schaumburg, to the Botanic Garden, to The Bean (downtown Chicago), have a backyard bbq for an early birthday celebration, have her organize my Kalat Room, make lots of scrapbook pages, catch up with what's going on with the rest of the family in the Philippines.

There will be lots of things to talk about and do!


Friday, May 04, 2012

A Mini Album by Nancy and Me

Nancy asked me if I could show her how to make mini albums. Nancy is a crafter.  She makes jewelry, sews, quilts, scrapbooks, cooks, bakes...! She wanted to make some minis for her daughters for Mother's Day and a baby girl album for her step-grand daughter.  We shopped together for paper and embellishments and planned to do our scrapbooking together during our lunch break.

Nancy did all the cutting (chipboard and patterned paper) and painted the edges of the album pink. I did the tags and photo mats.

I helped put the album together as Nancy ran out of time.  I took everything home and worked on it Wednesday night from after dinner to 12:00 midnight.

Paper used is by Colorbok.  Nancy bought the stickers, I provided the Recollections flowers and bling and the ribbons.

 I glued a butterfly cut-out from another patterned paper and instructed Nancy to sign next to it.

 The album is made up of 6 pieces of 8 x 8 chipboard.

 I made the photo corners using strips of paper and folding them into tiny triangular pockets.
The white photo mats are there to let Nancy's step daughter know the placement of the 6x4 photos.  She can take these out and replace them with the baby's photographcs.

This page has a pocket cut out from one of the patterned papers.  The pocket holds two journaling tags (which can be used to adhere smaller photos) and a bi-fold photo mat for 4 more photos.  The tag holders are made using Martha Stewart's butterfly puncher.


This is another photomat that opens up to reveal two more places for photographs (see below). 

  I did not glue the entire mat on the page so I can insert another journaling tag behind it.


Between each 8 x 8 page is a 4x8 piece of chipboard which was covered the same way the bigger pieces were.  On this one, I adhered the tag in such a way that it created a pocket for another tag.


 Just a simple page with a photo mat.

 Another photo mat that would  reveal 2 more pictures inside (see below).


I placed a bi-fold photo mat on one of the narrow pages.  I did not glue it entirely on the page so a tag could peek out of it.

 I covered up an envelope with patterned paper from the same stack.  Nancy's step daughter can keep more pictures in it, or perhaps write a letter to her baby girl.

 This is the envelope which I adhered on 3 sides only so it will serve as a pocket for 2 tags.

 Nancy made this page and she is so proud of it!

 She decorated this page also. The photo mat also opens up (see below).


 This photo mat opens to the left (see below).


....and here's the last page!  I had fun making this.  It was difficult to let go of it, but I had to :)
And for helping Nancy with this mini, she will make me one of her quilted Christmas stockings!

Thanks for looking.


Monday, October 10, 2011

American Girl

I saw this American Girl stack at Michael's and the papers are just sooooo super cute! Of course, by this time my daughter is no longer this little girly girl but I went ahead and bought it anyway thinking she's got all the girly girl pictures that I have not scrapbooked yet.

The idea of the tall envelope mini is Laura Dennison's at followingthepapertrail.ning.com.  She has a tutorial on how to make this mini using business envelopes.  Mine are all recycled envelopes..  I found it tedious or perhaps I was just a little impatient... but here's what I came up with.

 The mini album is made of 2 business envelopes.

 I used a Troll key chain doll which I had for just like forever... as the charm.  I tied pieces of lace on the key rings which I used to bind the pages together.

 The first page is made up of several tags with prima flowers and a Martha Stewart butterfly die cut which I stickled with blue.  Below is a close-up of the flowers and butterfly.


Below is the first page with the tags, which can be used as additional photo mats, were taken out of the small pocket.

I just love these papers! the colors are so vibrant!

More tags or photo mats...


All I have to do now is add the pictures!  TFL.


Saturday, June 04, 2011

A Mini for Father's Day

What shall I give my hubby for Father's Day? Can't get him any clothing, he'd rather choose his own. He's somewhat picky with his colors and the feeling of the material against his skin.

He's into photography, which I don't know anything about it and for a couple of Father's Day now I've been saying, "get yourself something for your photography supplies on Amazon".  It is so different if I hand him something I bought that he has no idea about.

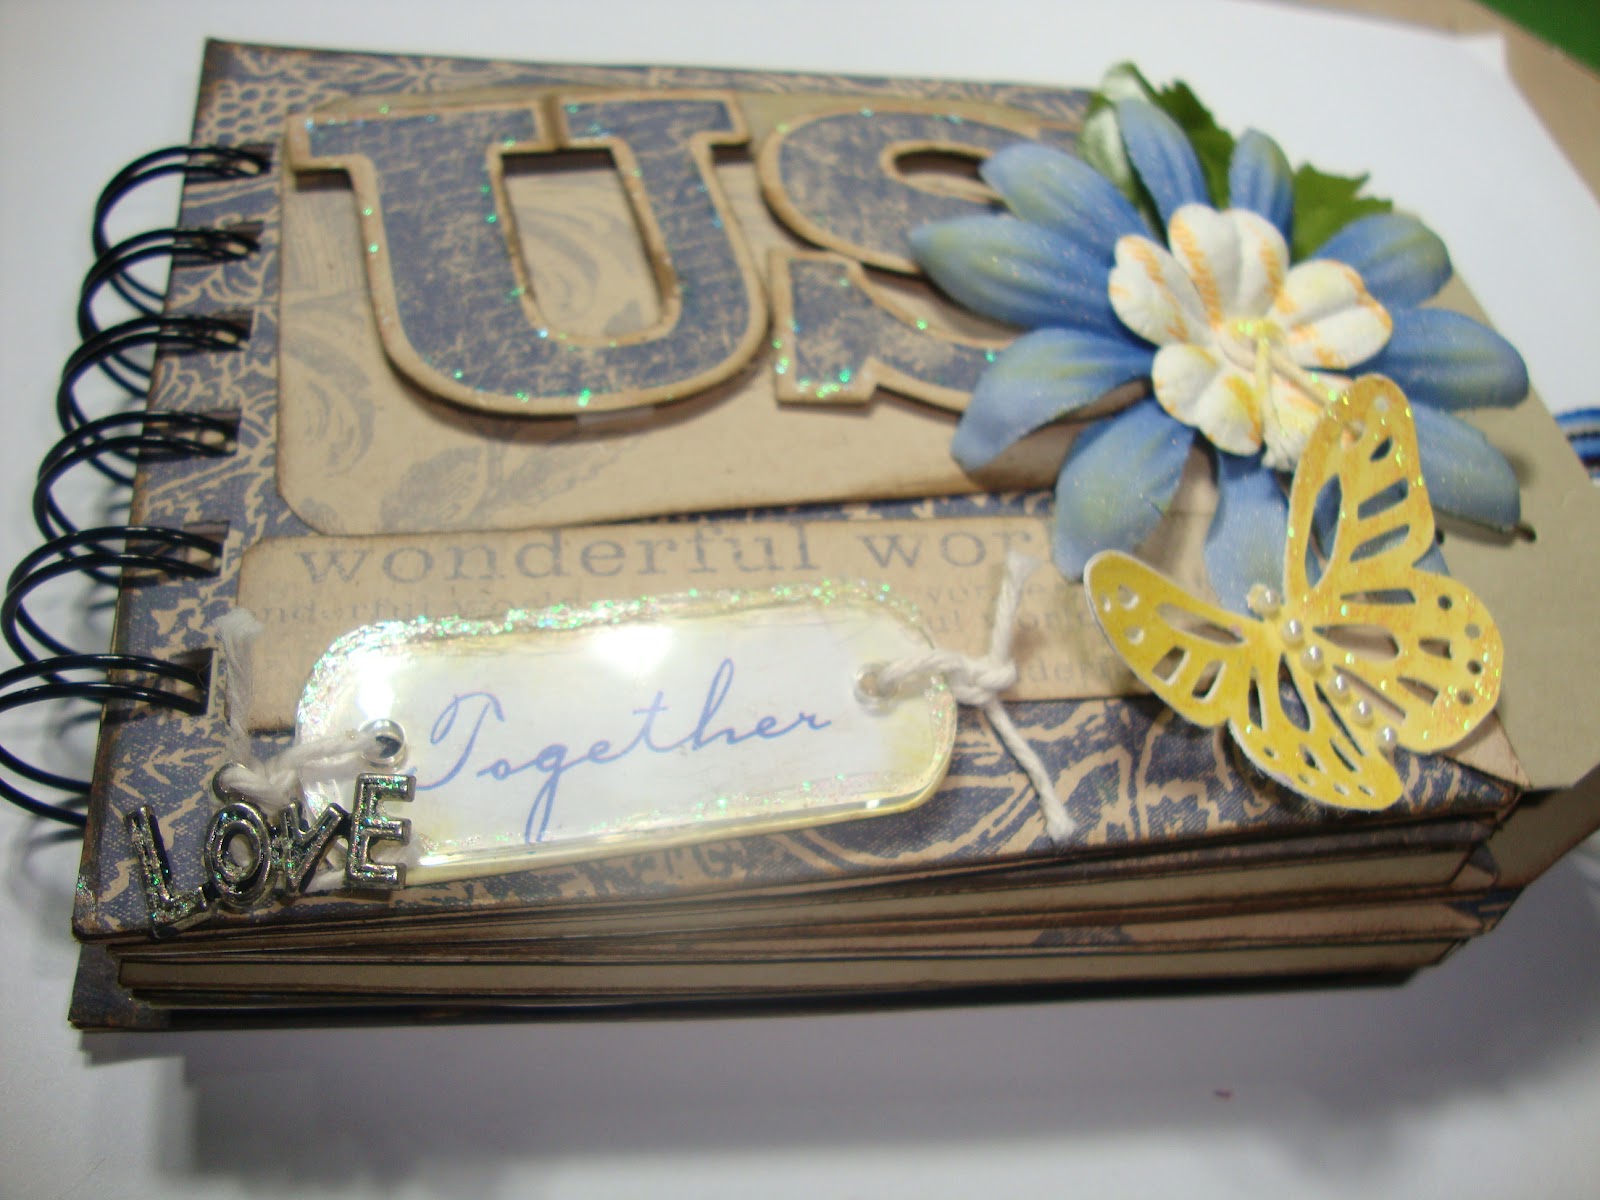
This year, I made him a mini album. I meant for the mini to house pictures of just the two of us.

The paper I used is a Deja Views 8x8 mini stack.

 I think I recycled 10 business envelopes.  I love the simplicity of the design - what a wonderful world.

 Each envelope serves as a pocket for more photo mats.

 Sample pictures that I included in this mini just to show placement of photos.

 I bound the pages using my Zutter bind-it-all


 I just added my daughter's picture to show that this is a frame and a photo can be inserted from the top.

 Little tags within little pockets


Fin.... the end.  I just love this part and I hate to cover it up with anything else!
The design was inspired by Marion Smith.

TFL.